Overview

This section highlights the core features, use cases, and supporting notes.

Flameshot is an open-source screenshot tool for Windows users who want fast region capture, on-screen annotation, configurable shortcuts, and optional command-line control in one app. It is especially useful for support work, documentation, tutorials, and daily team communication where screenshots often need arrows, text, blur, or scripted capture actions.

Flameshot is most worth judging as a screenshot workflow tool rather than as a simple snipping utility. On April 15, 2026, the official site still positioned it as open-source screenshot software focused on speed, built-in annotation, customization, and command-line use. That matters because many Windows users do not just need to copy pixels from the screen. They need to capture a region, add arrows or blur, save or copy it quickly, and repeat that flow dozens of times a day without breaking concentration.

Annotated screenshot of the official Flameshot homepage
The homepage matters because it frames Flameshot as a practical capture-and-annotation workflow tool, not just a screenshot button.

Customization is one of Flameshot’s strongest real differentiators. The official site and docs both point back to configurable colors, button choices, keyboard shortcuts, and save behavior. That is exactly the kind of flexibility that keeps a screenshot tool installed long-term. A capture app that cannot adapt to your shortcut habits, save location, or interface preferences often becomes annoying even if it looked good on the first day.

Annotated screenshot of the Flameshot customization section
Customization matters because shortcut behavior and save habits are what make a screenshot tool stay efficient in daily use.

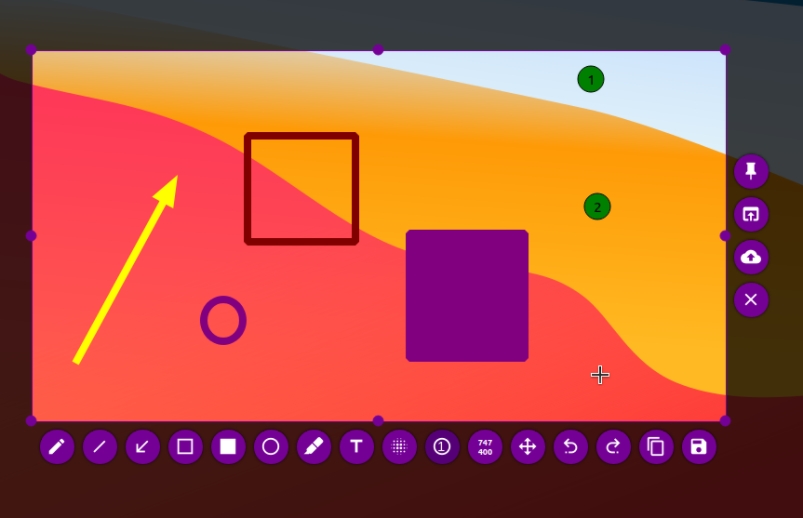
Built-in editing is the other big retention feature. The official homepage makes clear that Flameshot can add arrows, text, highlights, blur or pixelation, counters, and shaped borders directly inside the capture flow. That saves a surprising amount of time. For support staff, teachers, technical writers, QA work, or anyone answering questions with screenshots, the ability to annotate immediately is often more important than the raw capture itself.

Annotated screenshot of the Flameshot in-app editing section
Editing matters because arrows, blur, and text tools let users finish many screenshots without opening a second application.

The command-line angle is where Flameshot becomes more than a visual utility. The official site and command-line docs both show that it can be driven from commands, shortcuts, and automation. This is especially useful for power users, scripted capture workflows, and people who want predictable behavior behind hotkeys. On Windows, the docs also note an important implementation detail: command-line use goes through flameshot-cli rather than plain flameshot. That is the kind of detail a useful page should surface early.

Annotated screenshot of the Flameshot CLI feature section
The CLI matters because scripted capture commands and shortcut-driven actions are one of the clearest reasons advanced users keep Flameshot installed.

The official Windows installation guide is stronger than a simple download mirror because it lays out several realistic paths: package managers such as WinGet, Scoop, and Chocolatey, plus manual installation via the GitHub releases page, including the distinction between installer and portable packages. That makes the software easier to recommend responsibly. Users with no admin access, for example, can judge the portable path upfront instead of discovering that limitation too late.

Annotated screenshot of the Flameshot Windows installation guide
The installation guide matters because Flameshot supports package managers, installer builds, and portable use instead of forcing one Windows path.

The key-bindings documentation is where Flameshot starts feeling like a real workflow tool. Official docs spell out capture-mode shortcuts for copying, saving, undoing, resizing the selection, choosing tools, and using Print Screen or screenshot history behavior. That matters because screenshot speed is usually a keyboard problem as much as a graphics problem. The more often a user captures screens, the more valuable good shortcut memory becomes.

Annotated screenshot of the Flameshot key bindings guide
Key bindings matter because copy, save, undo, and Print Screen behavior define whether capturing feels fast or awkward.

The configuration and command-line docs together make Flameshot easier to trust for long-term use. The configuration page shows the supported ways to adjust behavior, while the command-line page explains practical commands such as flameshot gui, flameshot full, delayed capture, save paths, clipboard actions, and pinning. This is exactly the level of detail that helps a reader stop searching and start using the tool well.

Annotated screenshot of the Flameshot configuration guide
Configuration matters because a screenshot tool only stays efficient when its shortcuts, tray behavior, and save options fit the user’s real workflow.
Annotated screenshot of the Flameshot command line options guide
These options matter because Windows users can automate GUI or full-screen captures, but they should know the executable naming difference on Windows before scripting it.

The Windows help page is especially valuable because it addresses one of the most common real pain points: Windows itself intercepting Print Screen or Win + Shift + S behavior. Official docs explain how to disable the built-in snipping shortcut, how to assign custom shortcuts, and how tools like PowerToys may fit into the workaround. That kind of operational guidance is important. Without it, users can wrongly assume Flameshot is broken when the real issue is shortcut conflict at the OS level.

Annotated screenshot of the Flameshot Windows help guide
Windows help matters because Print Screen conflicts can make users think Flameshot failed when Windows is actually intercepting the shortcut.

Our grounded judgment is that Flameshot is most worth installing for Windows users who take screenshots often and want capture, annotation, shortcut control, and even automation in one open-source tool. It is less suitable for people who only take occasional basic screenshots and are already satisfied with the built-in Windows snipping flow. Flameshot looks strongest when screenshot work is frequent enough that speed, annotation, and hotkey control begin to matter.

Setup / Usage Guide

Installation steps, usage guidance, and common notes are maintained here.

The best way to start with Flameshot is to treat it as a screenshot workflow upgrade for Windows, then set up the right install path, fix any shortcut conflicts, and test one real capture flow with annotation and save behavior.

  1. Open the official Flameshot site at https://flameshot.org/, then review the official Windows installation guide at https://flameshot.org/docs/installation/installation-windows/. This gives you both the feature overview and the real Windows setup choices.
  2. Choose the Windows install path that fits your situation. If you prefer managed updates, use WinGet, Scoop, or Chocolatey. If you need a manual install, go through the official GitHub releases page. If you do not have admin rights, the portable build may be the better fit.
  3. Install Flameshot or extract the portable package, then launch it once and confirm the tray icon is available. This matters because many of Flameshot's configuration and shortcut options are easiest to reach from the running application state.
  4. Before relying on Print Screen, test whether Windows is already intercepting that shortcut. If Flameshot does not react as expected, use the official Windows help page to disable the built-in snipping shortcut or create a custom shortcut instead.
  5. Run one normal region capture and try the essential on-screen actions: copy to clipboard, save to file, add text, draw an arrow, and blur or pixelate a sensitive area. This single test will tell you more than reading a long feature list.
  6. Open the configuration dialog and set the options that matter for daily use first. Good starting points are shortcut behavior, default save habits, and any visual settings that make the annotation interface easier to read.
  7. Read the key-bindings guide and memorize the few shortcuts you will actually use all the time, such as copy, save, undo, and tool switching. Screenshot speed improves quickly once these actions stop requiring mouse-only navigation.
  8. If you plan to use Flameshot in scripts or launcher shortcuts, read the command-line options page before guessing. On Windows, the docs explicitly note that command-line use goes through flameshot-cli, which is an easy detail to miss.
  9. Test one command-driven workflow, such as opening the GUI capture mode, running a delayed full-screen capture, or saving directly to a chosen path. This is where Flameshot becomes more than just a screenshot button.
  10. If you share screenshots often, decide whether your default result should live in the clipboard, a file path, or a pinned capture. Setting this habit early helps keep screenshot work consistent instead of messy.
  11. Keep updates tied to the official site, official Windows docs, and the first-party GitHub releases page rather than third-party download mirrors. This matters for both trust and troubleshooting accuracy later.
  12. After several days of real use, judge Flameshot on one practical question: does it make capturing and explaining things on Windows fast enough that you stop reaching for the built-in snipping tools?

A practical Flameshot setup usually means one verified Windows install path, one solved shortcut strategy, a few memorized capture hotkeys, and a save or clipboard habit that matches how screenshots move through your daily work.

Related Software

Keep exploring similar software and related tools.