Overview

This section highlights the core features, use cases, and supporting notes.

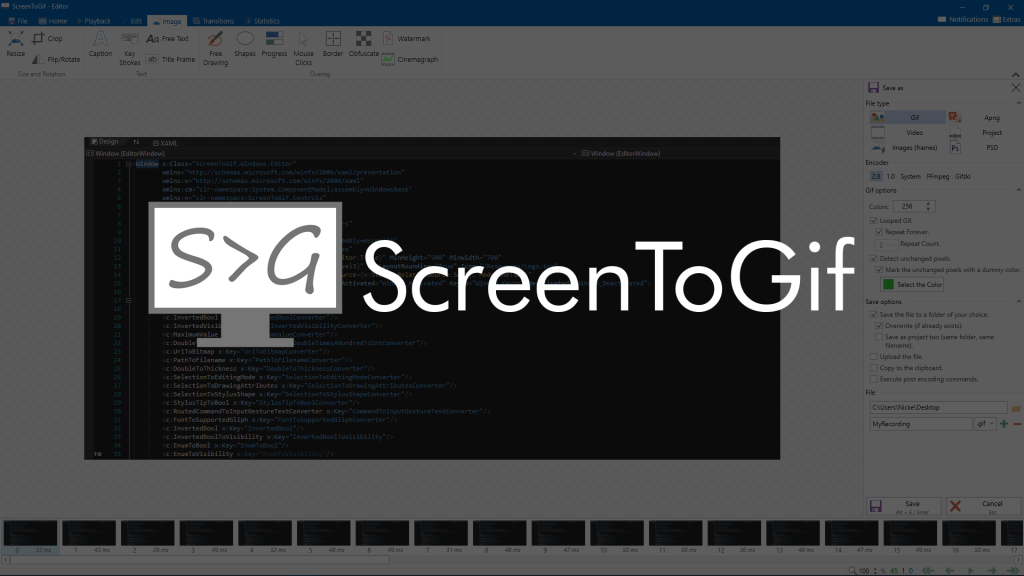
ScreenToGif is a Windows screen recorder and frame-by-frame editor for people who need short GIF walkthroughs, bug-report clips, UI demos, or quick tutorial visuals without moving into a heavyweight video workflow. Its real value comes from the stop-to-editor handoff, practical trimming and annotation tools, export choices beyond GIF, recording options for cursor and timing behavior, and startup parameters that make repeatable capture setups easier.

ScreenToGif is best understood as a short-form capture tool for Windows, not as a full replacement for long-session screen recording software. The official help page says very plainly that it was designed to work as a quick and small screen recorder and even recommends switching to more advanced software if you plan to record more than a few minutes. That honesty is part of why the tool is still worth recommending. People searching for a Windows screen recorder to GIF, a lightweight GIF maker for tutorials, or a screen capture tool for bug reports usually do not need a giant production suite. They need something fast enough to open, capture a short sequence, and turn it into a usable visual without a second app in the middle.


Annotated screenshot of the official ScreenToGif help page showing the quick short capture positioning
This help-page screenshot has real value because it shows the software’s positioning without marketing fog: ScreenToGif is meant for quick short captures, and that expectation makes daily use much smoother. Click the image to open the full-size screenshot.

The recording guide shows why the first-use experience is approachable. ScreenToGif offers a standard screen recorder as well as webcam and board recording modes, and the screen recorder keeps the core controls visible: snap to window, frame rate, region size, record, pause, and stop. The important practical detail is that stopping a recording opens the editor with the captured material already loaded. That removes one of the most annoying handoff problems in lightweight capture tools. You do not just record and then figure out a separate cleanup process later. For quick product walkthroughs, UI issue reports, or micro tutorials, that direct record-to-edit flow is the real convenience.


Annotated screenshot of the official ScreenToGif recording guide showing recorder controls and the stop to editor flow
The recording screenshot matters because it shows the controls that actually shape first-use success: capture region, frame rate, and the stop action that sends the clip straight into editing. Click the image to open the full-size screenshot.

The editor is the real long-term reason to keep ScreenToGif installed. The official editor guide explicitly calls it the main feature of the app and describes the ribbon, viewer, action sidebar, and frame list as separate working areas. That is the difference between a one-off recorder and a tool people return to. Frame-level trimming, light annotation work, and the ability to import existing GIFs or videos mean ScreenToGif is not only for fresh captures. It can also rescue or refine material you already have. For users who regularly document interface behavior, fix awkward pauses, or want a frame-by-frame GIF editor for Windows that stays smaller than a full video suite, this part matters more than the recorder itself.


Annotated screenshot of the official ScreenToGif editor guide showing the editor as the core feature
This editor screenshot deserves space because it points to the software’s real retention value: after recording, you can still clean up, annotate, and shape the result in one focused workspace. Click the image to open the full-size screenshot.

Exporting is also broader than the name suggests. The official export guide says ScreenToGif can currently export five output types: animated GIF, APNG, video, a ScreenToGif project file, and individual image frames. That makes the tool more flexible than a simple GIF-only recorder. The same guide also notes that ScreenToGif has a basic AVI encoder built in, but users who want formats such as MP4 or WebM need FFmpeg. This is exactly the kind of expectation that should be stated upfront. If your goal is a shareable animated GIF, you can stay very lightweight. If you need a more video-like deliverable, the workflow can still get there, but you should expect one extra dependency.


Annotated screenshot of the official ScreenToGif export guide showing multiple output types and FFmpeg caveat for more video formats
The export screenshot is useful because it prevents a common misunderstanding: ScreenToGif can do more than GIF, but broader video export may require FFmpeg and a slightly more deliberate setup. Click the image to open the full-size screenshot.

The options page is where ScreenToGif becomes practical for repeat use instead of only one successful capture. The official options guide lists controls for showing the cursor, detecting mouse clicks, using a pre-start countdown, enabling fixed frame rate mode, and enabling asynchronous recording to reduce interface lag. It also documents startup-window behavior, so the app can open directly into the screen recorder, webcam recorder, board recorder, or editor. These settings solve real workflow pain points. A tutorial author may need visible cursor and click cues, while a developer capturing a quick bug reproduction may want fewer visual overlays and a faster launch path.


Annotated screenshot of the official ScreenToGif options guide showing cursor capture countdown frame rate and startup choices
This options screenshot matters because it highlights the settings that turn ScreenToGif from a one-time utility into a dependable everyday capture tool. Click the image to open the full-size screenshot.

The startup-parameters page adds another layer of value for technical users. The official wiki documents parameters that can open a specific window, define a capture region, set capture frequency, apply a time limit, and even start capture automatically when the screen recorder is the chosen startup window. That means ScreenToGif is not limited to purely manual use. Support teams, QA staff, and people who repeatedly document the same workflow can make the tool behave more predictably. For a lightweight Windows GIF recorder, that kind of repeatable setup is a meaningful advantage.


Annotated screenshot of the official ScreenToGif startup parameters page showing repeatable capture arguments
The startup-parameters screenshot is valuable because it shows ScreenToGif can fit repeatable recording routines instead of always depending on manual setup from scratch. Click the image to open the full-size screenshot.

The network-connections documentation is also more useful than it may look at first glance. It explains that ScreenToGif can make internet connections for update checks and some optional online-related features. For many users this is not a problem, but it is still better to know it before deployment, especially in restricted environments or privacy-sensitive machines. A lot of small utilities never explain this clearly. ScreenToGif at least provides a dedicated page describing what kinds of connections the app may open and why. That helps set honest expectations for IT-managed environments or users who prefer tools with predictable network behavior.


Annotated screenshot of the official ScreenToGif network connections page showing update check behavior and optional online dependencies
This network-connections screenshot adds real decision value because it helps users understand what online behavior to expect before they install the tool in a locked-down or privacy-aware environment. Click the image to open the full-size screenshot.

Our grounded view is that ScreenToGif is most worth installing for people who make short tutorial visuals, repeatable support clips, product walkthrough snippets, or bug-report recordings where trimming and annotation need to happen quickly. It is much less suitable for long webinars, full training sessions, or heavy video production work. The strength of ScreenToGif is not raw recording ambition. It is the combination of honest short-form scope, fast editor handoff, practical frame-level cleanup, and enough export and startup flexibility to stay useful after the first capture.


Setup / Usage Guide

Installation steps, usage guidance, and common notes are maintained here.

The safest way to start with ScreenToGif is to treat it as a short capture and cleanup tool first. Begin with one small recording, learn the record-to-editor flow, decide which export type you really need, and only then add extra options such as cursor effects, startup automation, or broader video export.

  1. Download ScreenToGif from the official website, and if you need release-level verification, cross-check the official GitHub release page. Keeping the source official matters because screen-capture tools are common targets for repackaging on third-party download sites.
  2. Launch the app and look at the available entry points before you record anything. ScreenToGif is not only a screen recorder. The official docs also expose webcam and board recorders, plus an editor that can work with imported material.
  3. For your first test, choose the normal screen recorder and keep the task deliberately short. The official guide itself says the tool is meant for quick and small captures, so a 5 to 20 second workflow is the right place to learn.
  4. Set a small capture region and a reasonable capture frequency before pressing record. A smaller region is easier to review and export, and it reduces the chance that your first clip becomes noisy or unnecessarily heavy.
  5. If the capture is for a tutorial or bug report, decide whether you want the cursor visible and whether click detection or a pre-start countdown would actually help. These options are useful, but the first run is clearer when you only enable what the clip truly needs.
  6. Record one short action and press Stop instead of trying to build a perfect long sequence in one take. The important behavior here is that ScreenToGif opens the editor with the capture already loaded, which is where most cleanup happens.
  7. In the editor, trim dead time first. Remove empty lead-in frames, long pauses, and obvious mistakes before you touch anything decorative. This gives you the fastest improvement with the least effort.
  8. If the clip still needs explanation, use the editor tools for captions or other lightweight annotations, but keep them purposeful. The software is strongest when it helps clarify a short workflow, not when it turns into a full design project.
  9. Choose the export target based on the real destination. Use GIF when you need broad shareability, APNG when image quality matters and the destination supports it, video when the clip belongs in a more video-friendly workflow, and a ScreenToGif project file when you may need to revise the capture later.
  10. If you need formats such as MP4 or WebM, read the official export guide and set up FFmpeg before you promise that deliverable to anyone else. The docs are clear that broader video export depends on that extra tool.
  11. Once one manual workflow feels stable, open the options page and tune only the settings that affect your real work. Cursor visibility, countdown, fixed frame rate behavior, asynchronous recording, and startup window selection are the options most likely to improve everyday use.
  12. If you repeat the same capture pattern often, move into startup parameters. The official wiki documents ways to open the screen recorder directly, define a region, set capture frequency, apply a time limit, and even start capture automatically. That is useful for QA, support, and repeatable tutorial production.
  13. Before deploying ScreenToGif in a restricted environment, read the official network-connections page so update-check behavior and optional online dependencies are not a surprise. This is especially important on managed workstations.
  14. After a week of use, decide whether ScreenToGif belongs in your long-term workflow. If your daily need is short capture, quick trim, and practical export, it earns its place very easily. If most recordings are long sessions, you will probably be happier with a more video-oriented recorder.

A practical long-term setup usually looks like this: short capture scope, clean stop-to-editor workflow, project files kept when revisions are likely, FFmpeg added only when broader video export is actually needed, and options or startup parameters tuned around one repeatable use case. That keeps ScreenToGif fast, understandable, and much easier to maintain than a bloated recording stack.

Related Software

Keep exploring similar software and related tools.